Render Video Workspace
← User Guide · Workspaces · Next: Modify Frame →Render Video is the main workspace for video-to-video generation. Most production work happens here.
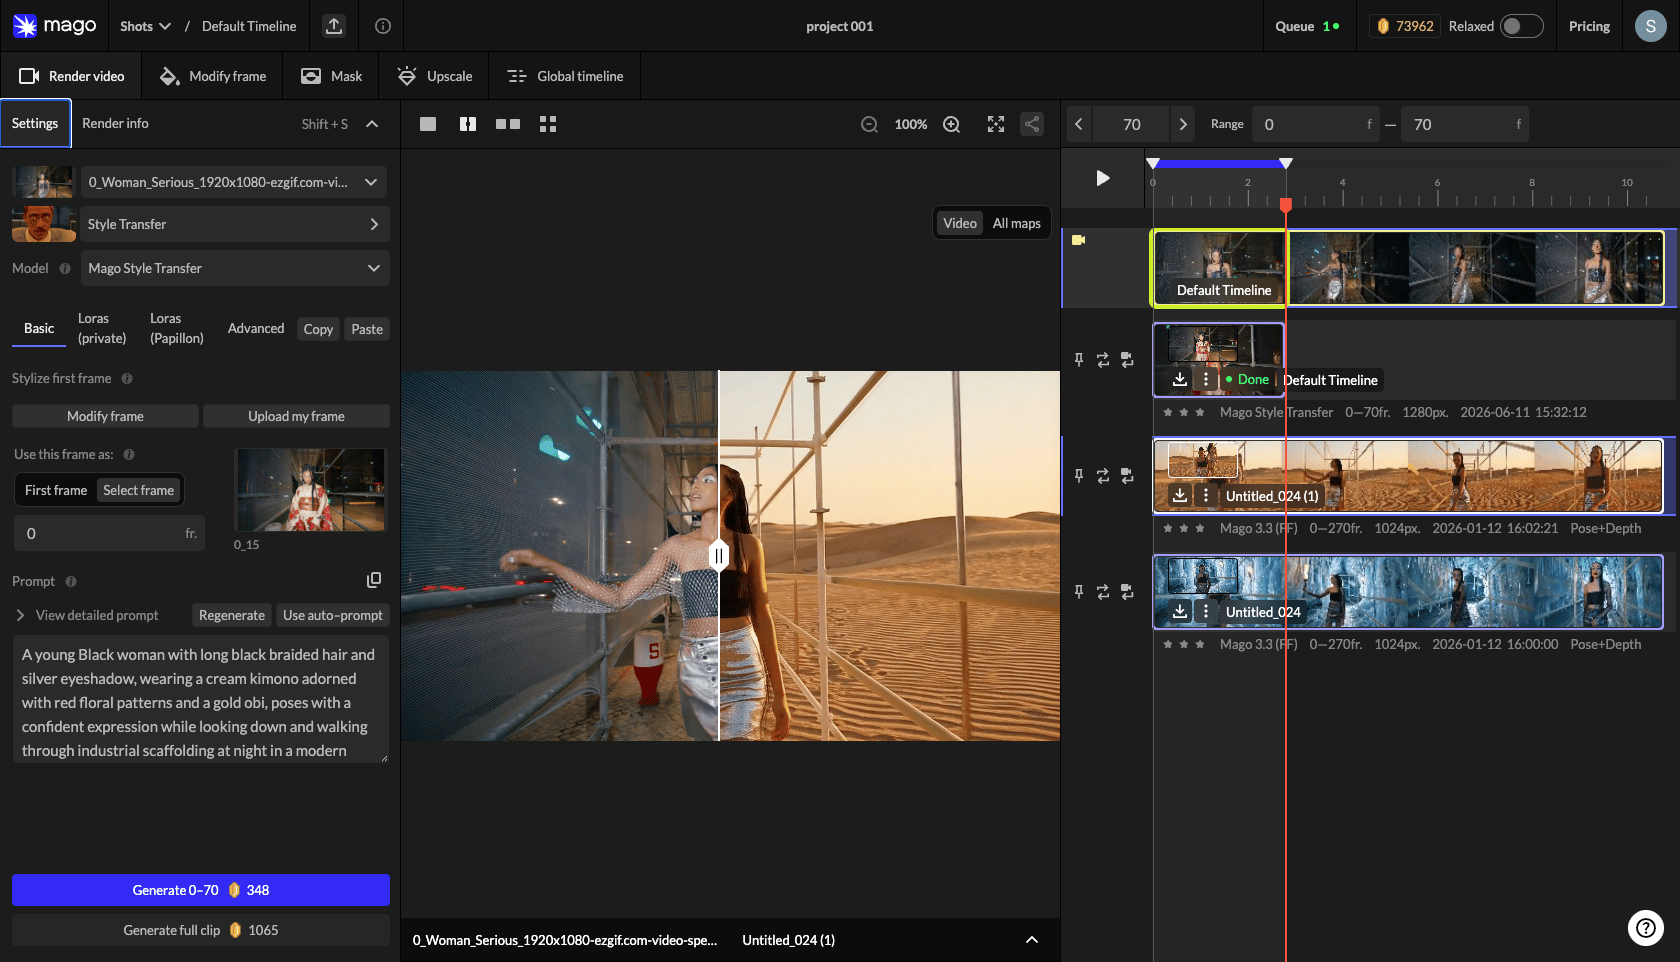
Layout
- Left panel — Settings tab and Render Info tab.
- Center — viewport showing the active source or render.
- Right — vertical timeline: source track at the top, render tracks stacked below.
Source video selector
At the top of the Settings panel — a dropdown of all videos in the current shot. By default the original source is selected. Any render in the shot can be used as a source for further renders, which is the basis of the multi-pass workflow.Presets
Quick-start configurations that set a model and a baseline of settings for a use case:- Style Transfer — Mago Style Transfer with defaults for restyling acted footage.
- Inpainting — Mago Inpaint with defaults for editing specific parts of a video.
Model selector
The single most important setting — the chosen model determines what the rest of the panel exposes. See the Model catalog and the decision tree.Settings panel structure
Most Render Video models share a similar layout, though specifics vary.Basic tab
- Style or first frame — a frame that anchors the style or beginning of the render: a modified frame, an uploaded image, or a keyframe at a specific frame number. Some models accept a looser reference frame instead.
- Prompt — describes the desired result (Mago) or instructs the model (closed-source). See Prompting.
- Auto Prompt — generates a prompt from a description of the source and the reference frame. Regenerate or Use Prompt. Adapts to scene context (e.g. drops human terms for a nature scene).
- Negative prompt — excludes unwanted content. Common: low quality, NSFW, extra faces, deformed.
- ControlNets (Mago Transform only) — depth, pose, softedge (beta), depth+pose, normal map (beta). See Mago Transform → ControlNets.
Advanced tab
| Setting | What it does |
|---|---|
| Output size | Longest side of the output. Default 1280. Higher costs more and is slower. |
| Steps | Inference depth. More steps = sharper, more detailed, slower, costlier. |
| Interpolation | Renders every other frame and interpolates. Cheaper/faster but may miss fine detail. |
| Image sequence export | PNG or EXR 16-bit. EXR is for VFX pipelines (Mago Transform & Style Transfer). |
| Prompt influence (CFG) | How closely the model follows the prompt. |
| Color consistency | Controls color stability across frames. |
| Seed | Same seed + same settings = same output. Useful for reproducibility. |
| Shift / low step accelerator | Trades fewer steps for slight color drift; speeds up exploration. |
Context settings (Mago models, long renders)
Long renders are split into chunks; these control the chunking.| Setting | Default | Notes |
|---|---|---|
| Context size | 150 | Frames per chunk. |
| Context overlap | — | Frames overlapping between chunks. Lower for high movement, higher for static/slow. |
| Start frame buffer | 1 | Warm-up frames at the start to prevent flicker. |
| Dynamic reference | On | Regenerates a reference between chunks. On by default for high-movement video; disable for very static shots needing maximum consistency. |
Generate buttons
Two buttons at the bottom of the Settings panel:- Generate (with frame range) — renders only the range selected on the timeline. Shows credit cost and frame numbers.
- Generate full clip — renders the entire source video. Shows cost.
🧪 Workflow — Always test on an 80–150 frame range before committing to a full-clip render. Lock in the model, prompt, and settings first.
← User Guide · Workspaces · Next: Modify Frame →