Mask Workspace
← Modify Frame · Workspaces · Next: Upscale →The Mask workspace generates masks — definitions of which parts of a video get edited and which stay intact. Masks are used primarily by Mago Inpaint, but can also be downloaded for external compositing.
When to use masks
Mask-based editing fits when:- Only a specific element needs to change (a character’s shirt, a single prop, the background only).
- The rest of the video must be preserved exactly.
- Repeated targeted edits are needed (mask once, apply many times).
⚠️ Warning — Don’t use a mask when the entire frame needs to transform. Use Mago Transform or Mago Style Transfer instead.
Mask generation modes
| Mode | How it works | When to use |
|---|---|---|
| Prompts | Text describes the element, e.g. “red car” or “main character”. | Quick masking when the element is easy to describe. |
| Points | Click the frame to mark areas with positive/negative points. | Precise selection of irregular shapes, or when prompts are ambiguous. |
| Prompts + Points | Combine both — prompts coarse, points refine. | Most reliable for complex scenes. |
Points editor
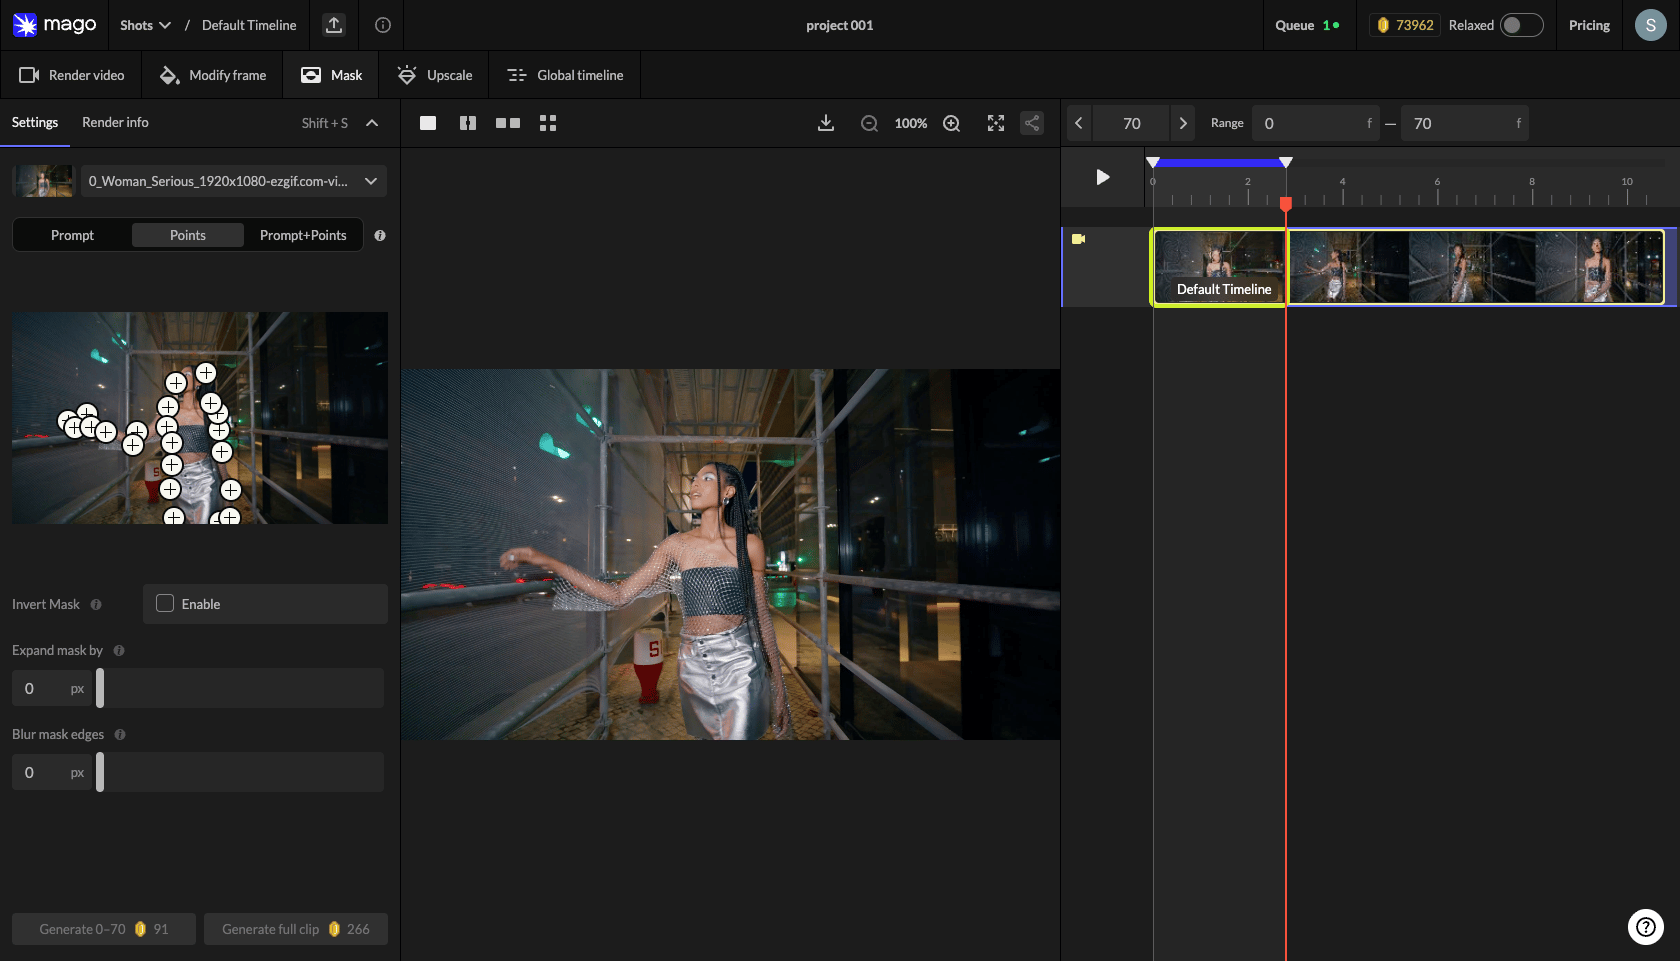
- Click the Points selector to open the editor.
- Switch to Add mode and click to mark areas inside the mask.
- Switch to Remove mode to mark areas excluded from the mask.
- Click any placed point to delete it individually.
- Use Clear All to start over.
- Switch frames if needed — the visual selection is anchored to the chosen frame. (Selection on any frame is being rolled out.)
Mask refinement
Three settings refine the generated mask:- Invert mask — swap inside and outside. Available under both Prompt and Visual selection modes. Useful when masking an element to keep while changing everything else.
- Expand mask — grow the mask outward by N pixels. Useful when too tight (visible seams), or for character replacement where the new character extends beyond the original silhouette.
- Blur mask — soften edges for smoother transitions.
Mask tracks
Mask renders appear in a dedicated timeline that shows only mask tracks in this workspace. Each mask track can be:- Used as input to Mago Inpaint in Render Video.
- Downloaded for external compositing software.
- Compared with the source via slider or side-by-side.
Recommended practice
- Always run a few test masks before committing to a render.
- Use the comparison slider to verify coverage against the source.
- If the mask is too tight, increase Expand by 5–10 px.
- If edges look hard in the final result, increase Blur.
- For multi-element scenes, use Prompts + Points for highest reliability.
📐 Pixel fidelity — Mago Inpaint, like virtually every video model, does not operate in pure pixel space. Unmasked regions can shift slightly (brightness, color) due to compression during processing. For pixel-perfect preservation: download the mask, run the Inpaint render, then composite the result against the original source in DaVinci, After Effects, or Fusion using the downloaded mask. See Export & compositing.
← Modify Frame · Workspaces · Next: Upscale →