Timeline & Tracks
← Global Timeline · User Guide · Next: Viewport & comparison →The timeline is the right-side panel showing every render in the current shot. It’s the unit of work organization at the shot level.
Why vertical?
Most video tools use horizontal timelines because video is read left to right. Mago’s timeline is vertical because AI rendering is iteration-heavy: you produce many versions of the same shot, stacked, rather than many shots in sequence. Vertical orientation gives more room to stack iterations.Frame controls
At the top of the timeline:- Current frame number — displayed and editable (click to type a specific frame).
- Previous / next frame buttons for precise navigation.
- Range selector — start and end frame fields, plus a visual blue bar on the ruler.
- Play button.
- Second markers on the ruler.
Range selector
The range selector defines which portion of the source video gets rendered. Generate renders only this range; Generate Full Clip ignores the range and renders everything. Recommended ranges:- Initial test: 80–150 frames — enough to see motion and verify the look without spending many credits.
- Refinement: 150–240 frames — verify temporal consistency.
- Full render: the whole clip, once settings are dialed in.
Source track
Always at the top, marked with a yellow camera icon. The original uploaded video. Cannot be deleted — the source is owned by the shot, not by a render.Render tracks
Render tracks stack below the source. Each represents one render and includes:- Starting thumbnail — first-frame preview.
- Timeline thumbnails — a strip of preview frames spanning the rendered range.
- Download button (MP4) — one-click MP4.
- 3-dot menu — download options and delete.
- Star rating — three-star quality marker for tracking favorites.
- Track name — rename by double-clicking.
- Badges — model name, frame range, resolution, timestamp, ControlNet (if applicable).
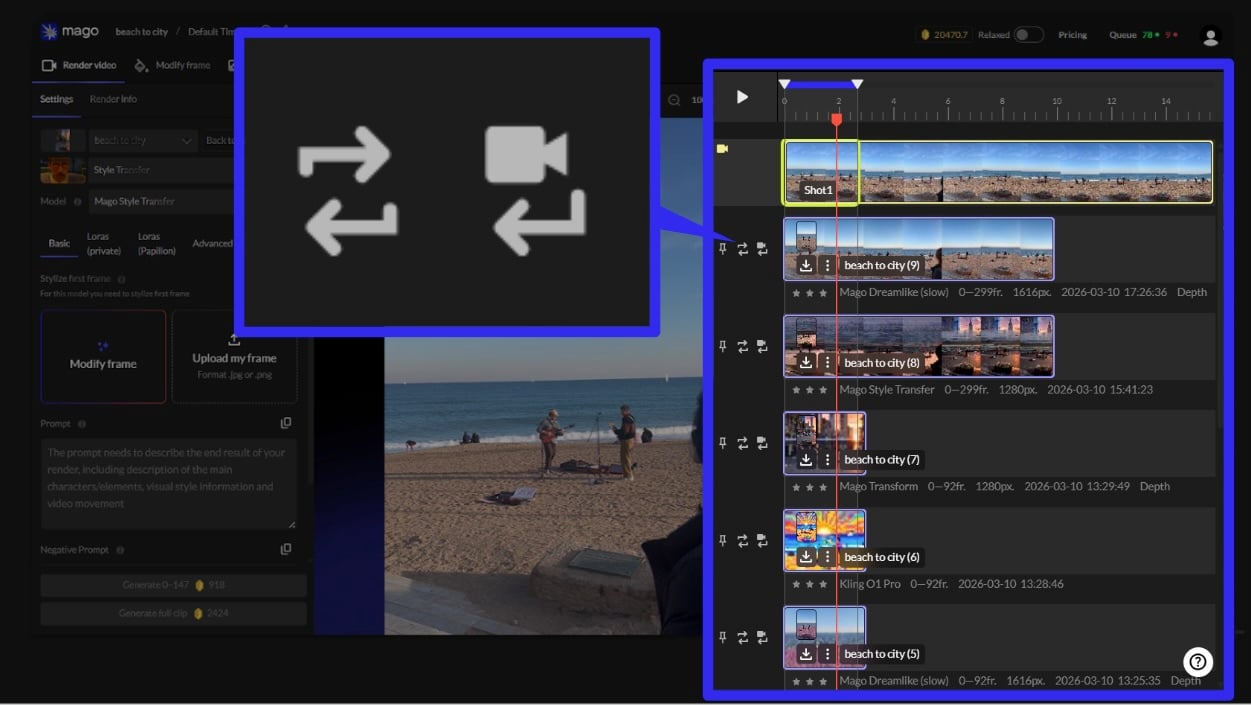
Track side buttons
Three buttons on the left edge of each render track:| Button | Function |
|---|---|
| Pin to Global Preview | Marks this track as the shot’s representative in the Global Timeline. One pin per shot. |
| Reuse Settings | Loads the track’s settings into the Settings panel — the quickest way to iterate with small tweaks. |
| Edit this Render | Uses this track as the input video for the next render. The foundation of the multi-pass workflow. |
3-dot menu options
| Option | Effect |
|---|---|
| Download PNG | Per-frame PNG export, zipped. |
| Download with info | MP4 with a settings overlay. Useful for production review. |
| Download EXR | EXR 16-bit sequence. Only if EXR was enabled in Advanced settings during render. For VFX pipelines. |
| Download as video and images | A single ZIP with video, frames, and settings. |
| Delete | Remove the track. |
Comparison
Click one track, then hold Ctrl/Cmd and click another to activate the comparison view (see Viewport & comparison). Up to four tracks can be compared at once. You can also activate comparison via the view-mode buttons at the top of the viewport.Mask track visibility
In the Mask workspace, the timeline shows only mask tracks — this avoids clutter when working on specialized tasks.Iterated tracks
A track produced by clicking Edit this Render on a previous track is an iterated track. It uses the previous render as input rather than the source video. This is how multi-pass effects are built — see the recipes.← Global Timeline · User Guide · Next: Viewport & comparison →