Projects, Shots & Renders
← Application Layout · User Guide · Next: Credits, Plans & Modes →Mago organizes work into a three-level hierarchy. Understanding it is essential to everything else.
| Level | Contains | Typical scope |
|---|---|---|
| Project | Multiple shots, optionally in folders | A film, sequence, series, or campaign |
| Shot | Multiple render tracks, all from the same source video | A single shot from the project |
| Render (track) | One generated output | A single render attempt — many per shot |
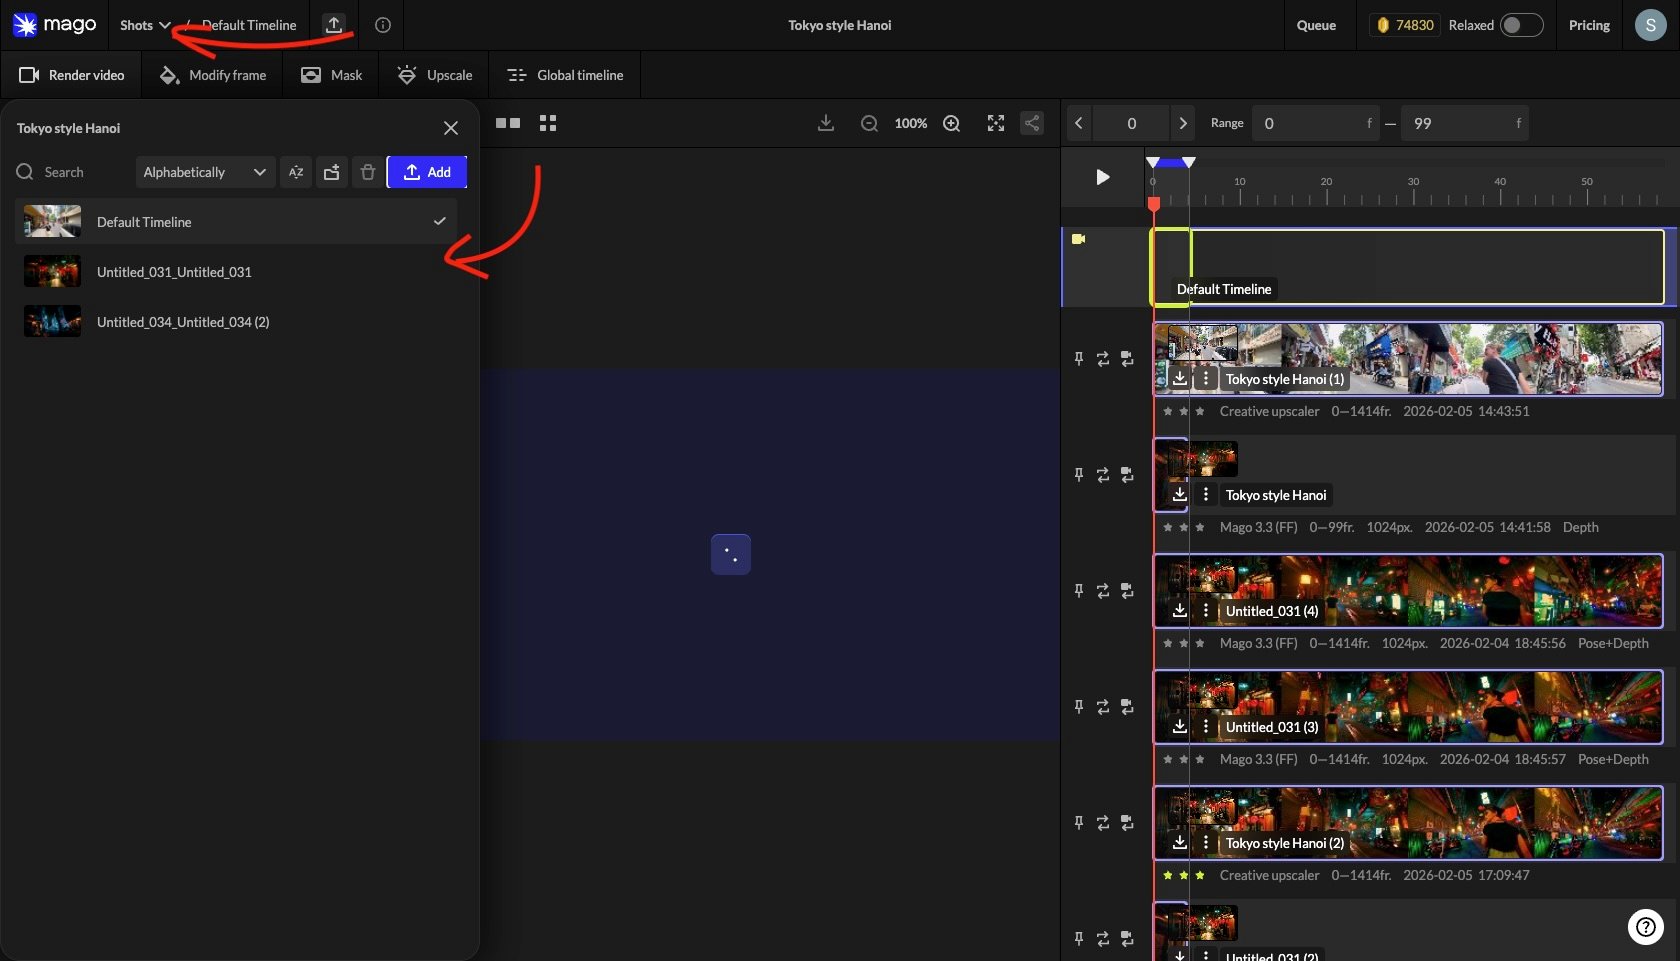
Project operations
- Create a new project from the Projects tab.
- Rename by double-clicking the project name in the top bar or project list.
- Delete from the project list.
- Search the project list by name.
- Sort by creation date or alphabetically, ascending or descending.
- Create folders, including nested subfolders.
- Drag projects into folders to organize.
Shot operations
- Add a new shot inside the current project.
- Rename by double-clicking the shot name.
- Delete from the shot list.
- Search and sort within the project.
- Organize shots in folders.
📐 Design note — Mago is built around shot-by-shot workflows. Don’t upload an entire scene as one source video. Split scenes into shots in an external editor first, then upload each shot — it makes iteration faster, settings more transferable, and review cleaner.
Project statistics
Each project has a statistics panel, opened via the ℹ️ icon next to the shot name. It shows:- Total renders made on the project.
- Total frames generated.
- Total cost in credits.
- Cost per frame (average) and cost per second (average).
- Per-render breakdown: model, frame range, and credit cost.
- Most-used models on the project.
Render tracks
Every render produces a new track in the shot’s vertical timeline, stacked below the source. Tracks can be rated, renamed, used as input for further renders (via Edit this Render), and downloaded. Full detail: Timeline & tracks.← Application Layout · User Guide · Next: Credits, Plans & Modes →